30 January 2008

mother blogs: quilted oven mitts

Hello! I'm still here. In the chill of winter I've actually been doing a lot of crafting, so I'll be trying to post about some of it over the next few days. There's a quilt in progress, and a new embroidery project, and some also clothes-sewing. (Have you seen the new Simplicity line of Project Runway patterns? I find this very exciting. I've already made a dress. More on that soon.)

I asked my mom to do a little guest-blogging because she made us the most incredible oven mitts ever for Christmas. (that sounds a little funny. best. oven. mitts. EVER. But it's true. Trust me.) So without further ado, here's the super-talented marmee:


I decided on a trip to visit the girls in July that I’d try to make Christmas gifts this year, and at the same time try to learn to machine quilt.

I’d bought Harriet Hargrave’s Heirloom Machine Quilting and had read it, but I’d never dropped the feed dog on my machine or done anything with a darning foot before.

So I thought I would try stitching around the designs on fabric first to see if I could learn in baby steps. Tracing was always a big save for me in art projects – I can copy almost anything!

Julie gave me some charming retro kitchen fabric that she’d been saving in her stash, and we picked out a gold cotton for binding. [The cool retro print was purchased from Superbuzzy. Looks like they're out of the blue, but still have it in light brown.]

The first issue was what batting to use. Julie said she’d seen a reference to insulated batting on some of the blogs she reads, so I dived into Google and came up with Insulbright. I used two thicknesses of cotton quilt batting (I bought a crib bat) and then one layer of Insulbright, and used a cotton duck that matched the background for the reverse. It was quite a sandwich.


I started sewing on the motifs at the center, working out toward the edges. As my book had suggested, I tried using my fingertips on both sides of the fabric to guide the fabric under the needle to “trace” the design with the sewing machine. At first I went through a ton of thread and made tiny, tiny stitches, but as I continued I was able to push the material faster and gain more confidence that I wasn’t going to fail to follow the pattern.

I also cheated (I am old enough to be entitled to cheat, I’ll have you know) because I used a Daylight lamp with a 5-inch diopter magnifying lens, which I shoved right in front of the needle. It made it a lot easier to see what I was doing.

It took a lot of time, but I find any kind of repetitive work like this soothing. We turned up the Big Band/Swing on the house stereo system, and I sat there and quilted. Is it because it’s sort of meditative? I don’t know – but I get a lot of thinking done when I do stuff like this.

Plus I really liked the way it turned out.

Then it was time to do gifts for everybody else in the family.


For my sister and sister-in-law, I used Moda quilting fabrics – I love the prints and the feel of the fabric. My sis has an elegant Provencal kitchen, so I used this brown paisley print with a smaller companion print on the back, and a third print for the binding. I also made a set for my sister-in-law, using some complementing Moda prints in blue.

Now to make some mitts and potholders for me! I’m my toughest client, that’s for sure, and I’ve been looking for something in blue and natural that will go with the Silestone countertops I got last Christmas. I think Julie found me the right fabric, though – this new Williamsburg quilt fabric she saw at PurlSoho’s website. I’ve never been big on birds, but I think I can center my design to focus on the flowers, not the birds. If my local quilt shop ever gets the blue back in stock, that is.

In the meantime, the girls gave me a wonderful gift: a machine quilting class, with them, in February. Something to look forward to, for sure!

From Julie: The mitts really are amazing. They are perfect in my tiny kitchen. And they are just so perfectly detailed. Now you know where my perfectionism comes from...it runs a bit rampant in our family!


Mama, you forgot to mention the great dishtowels you made to match! Yes, that's right. I have matching homemade dishtowel oven-door hangy things. Mom bought a single handtowel, cut it in half, and attached tops and tabs to them. Love.

Thanks mama for blogging!! xo

01 January 2008

brother blogs

Lest Julie and Twin retain their monopoly on thoughtful handmade gifts, their brother decided to build his girlfriend a jewelry box for Christmas, and Julie was kind enough to ask him to guest-blog about it.

The main box is made of cherry and measures 16” wide by 10” deep and about 4 1/2” high. The inside is lined with 1/4”-thick curly maple (a really cool wood with a distinctive figure that’s often used in musical instruments, particularly guitars) that I stained golden yellow to complement the dark red cherry. In the bottom of the box, the lining serves as a shelf for two removable trays, which sit just above (or “proud of” in woodworking-speak) the seam between box and lid. The lid is a simple raised panel with an unassuming 5/16” brass pull.

The design is largely based on an article from Fine Woodworking, available here with a subscription. I omitted several details, most noticeably the 1/8” hand-cut dovetails with mitered corners, which struck me as needlessly over-engineered and impossible for a woodworking mortal to build. (I admit the latter consideration was more important.)

I added a few details of my own: in addition to selecting different lumber, I used side rail hinges that screw into the sides of the box and have stays to keep the lid from opening past 95 degrees. They were a pain to install, but they’re much more mechanically stable than the itty-bitty box hinges with positive stops the FW author screwed precariously into the rear edge of his box. It’s simple physics: a box whose lid is attached with a stopped hinge behaves like a lever, so a light push on the top of the open lid produces a much larger force on the hinged joint. The hinges I used will withstand a lot more force before the screws fail or--worse yet--the wood into which they’re secured splinters out.

I also designed dividers for the trays and put fabric-covered foam inserts in the bottom of each compartment, a detail that makes the box a lot more useful and nicer to look at.


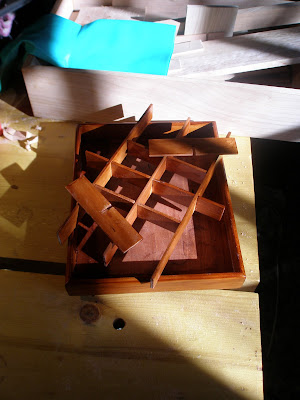
First, the divided trays: after laying out a sensible arrangement on graph paper, I cut the dividers to length from one-inch wide cherry that I planed to the same thickness as the kerf (i.e., blade width) of my tablesaw (about 1/8”). That way, the horizontal dividers could be interlocked with the vertical ones using notched half-lap joints cut on the tablesaw, which makes them more sturdy and easier to keep square during assembly. (An overview of the basic technique is available here. But one note of caution: the joints should fit tightly, and 1/8” stock is very easy to split if you’re not careful putting the pieces together.)

I prefinished the components before final assembly and then secured them into the trays with simple yellow glue. This process wasn’t as difficult as it looks, although it did require careful setup and accurate cutting.


Once the divided trays were built, I set about finding a way to line them with fabric. The technique described below is a variation of the one presented here. I settled on faux suede in a shade of green that looked nice with the wood. (I wanted something with a nap, but real suede is purported to tarnish silver and I didn’t think it would be as easy to work with.)

So that each compartment would have a cushioned surface, I cut padded inserts out of a product called Darice Foamies, which are 2mm thick foam pads with paper backing, available at Michael’s for around $0.80 per 8 1/2” x 11” sheet.

I cut the foam pads just slightly smaller than the compartments, leaving a gap of about 1/32” on all four sides so they’d fit snugly after being covered with fabric.

After the foam inserts were cut to size, I retained the services of a sewing / fabric consultant known on this blog as Marmee for instruction on how to create a pattern for cutting the fabric. (The two trays are divided into 28 compartments, but there are only four unique shapes, so making a pattern for each shape saves time).


Here’s the basic procedure: first, cut a piece of paper to just under twice the width and about one-and-a-half times the length of a foam insert. Place the foam insert in the center of the paper and trim the corners of the pattern off at 45 degrees, leaving about 1/16” between each corner of the insert and the angled edge of the pattern. The idea is to wrap the fabric around the insert like an envelope so the foam is completely covered and the fabric doesn’t bunch up sloppily at the corners or underneath.


Once all the cutting has been done, assembly is easy: just coat the back of each insert and its fabric cover with spray adhesive, move them to a clean surface, and fold the fabric around the four edges of the foam insert. If you’ve measured and cut everything carefully, the pieces should fit snugly in their compartments and won’t need to be glued in. I didn’t make the inserts permanent because I wasn’t sure how well they’d hold up over time and I wanted them to be removable so they could be replaced easily.


From Julie: How cool is my big bro? It's really even more gorgeous in person. I've put in an order for a box of my own, though I don't know when I'll get it... ;) Although the lovely recipient of this jewelry box certainly deserves it, both for putting up with my brother and for being such a sweet person.

21 December 2007

christmas roundup

We are getting ready to hop in the car and head to VA. Yippee! But before we head out, here's a quick roundup of some of our holiday activities. We made a new gingerbread village; it's becoming a bit of a tradition. See our village from last year. This time we wanted a whole town, with a town square. Some of our buildings were more successful than others, but we definitely had a lot of fun.


Town hall.


Shops. Grocer in the middle, barber shop on the end.


This is obviously some kind of posh shop. Dressmakers, maybe.


Townhouses opposite the shops.

Church in the corner of the square. Ice cream cone steeple was a bit tricky.


Beyond the square, there is a lake and Twin's estate. Mostly red, of course.


Minty little house.


We had a live tree this year. We also inherited some great old decorations from our great-aunt including this little angel:
and these cool glass ornaments:
I made a tree skirt for the little tree out of some crazy thrifted pillowcases. I think the whole effect is pretty cool.
And while I've been sitting here, Twin has gotten the car completely packed and now is tapping her toe. We're off!

Wishing everyone a very very very merry Christmas. Lots of peace and joy and a heck of a lot of candy, cookies, and roast beast.

30 November 2007

wreath and advent and hello!

Sorry for the long blogging absence! I just haven't had the brain space for crafting or blogging lately. Living in a new place, with a new job and new people, I'm finding that different priorities, needs, and plans are filling my head. I don't know yet whether the blog will grind to a halt, or limp along in a sad sort of fashion until it again becomes a larger part of my life, as it used to be. But regardless of the future of my little blog, I do want to say how much I have valued these friendships, and how big a role they have played in my growth, both artistically and personally, over the last couple years. This crafty blogosphere is a really really really really special place (really really). really.

We are slowly getting in the holiday mood around here. Over Thanksgiving, my Mom, sister and I made a new wreath for our front door. We started with a $5 wreath from the craft store and then blingified it. My Mom is the master of wreath blingification, and has made some absolutely beautiful wreaths with fruit, greenery, and other natural kinds of stuff (mostly plastic of course but it looks real). We decided to go a bit less traditional with ours, using glass Christmas balls and candy cane ribbon along with the greenery.

Mom melts hot glue nuggets in an electric griddle, and then you just dip and stick. Voila, blingy. The little bird in the middle of the wreath is from the Martha Stewart Kmart tree-trimming section, as are the candy cane ribbon and folksy christmas balls. I put a pretty penny in Martha's pocket that weekend, between her awesome tree decorations at Kmart and her craft stuff at Michaels. She so has my number.

This weekend we are going to string popcorn and make tree decorations. We are also going to make a new advent calendar from the design I created last year. I don't have any green paper left so I am going to get creative with my Martha Stewart glitter. I am trying not to buy any more craft supplies because it was becoming increasingly obvious that my hobby is no longer crafting; instead it is craft supply-buying. I am a pro at it, I can tell you.


*Update November 2010: This year I've got a new design for my advent calendar and am selling the templates on etsy! Check it out!*

07 October 2007

you can call me space boy

Space Boy as superhero. Red cape, check. Ray gun, check. Debonair smirk, check.

And snazzy Space Boy badge. Ready to save the world, or the nearest damsel in distress...

28 September 2007

feet up, weekend time

Happy weekend!

btw, have you seen Blogger Play? Strangely addictive. I think I could watch that thing for hours.

27 September 2007

letter for my favorite peeps

Twin and I have two dear friends that we've known since high school, but who live far away in other states now. It is a friendship that effortlessly survives long lapses of time spent apart, and the many miles that separate us. I fully expect it to last decades more. I have come to value this friendship even more in recent years as I have come to the slow realization that adult life can be, well, a little lonely.

We're not very good correspondents, and none of us are great phone-talkers. Several years ago, we started a "chain letter." At first we wrote by email, taking turns writing in an attempt to keep each other up-to-date on our lives. About a year ago, we decided to begin using real mail. More fun to get a package in the mail. And three letters in one package from your three best friends is about as good as it gets.

We always include little goodies and pretty stationery. I used one of my new port2port cards for my letter. I added new decorations to the envelope (we re-use the envelope, each adding new decorations as she sends the letter on).

And check out my new stamps. I usually just get the boring flag stamps, but my Mom had brought me these super cool stamps for the 400th anniversary of Jamestown. And then I was at the post office and I saw a sign for the Tiffany stamps. And then the Jimmy Stewart ones and the Disney ones. And I decided I just had to have them all. Who knows maybe I'll even become a philatelist (which is a word that sounds like it should be followed by an "excuse me").

The package is off to Texas (and I have been horribly slow with it this time--sorry guys!!) I think I will send it along its way with a row of Jimmy Stewarts. You can never have too much Jimmy Stewart.

26 September 2007

my mama's rolls

Did I say I was going to blog every day this week? I meant everyday except Tuesday. Because Tuesday, though it was not a terrible, horrible, no good, very bad day, did not have anything particularly to recommend itself and I am very happy to abandon it to the fogs of memory as soon as possible.

Wednesday, now wednesday is looking up. Twin had a potluck at work today so we made a batch of my Mom's rolls. These are holiday rolls in our house, and smell like Christmas to me. Buttery and delicate and completely delicious. They are especially good with a very thin layer of country ham inside.

In microwave-safe bowl, heat until hot:
2 cups milk

Add:
1 stick (1/2 cup) butter
2 tsp salt
1/2 cup sugar

Let cool until butter has softened.

In mixing bowl, combine:
4 cups flour
3 pkg dry yeast (one strip)

Stir in milk mixture and beat for five minutes.
Add 4 eggs, one at a time, beating well after each addition.
Add more flour (1/2 to 1 cup) until dough holds together but is still very soft. (It is much gloopier than most bread doughs)

Sprinkle 1/2 cup flour over the top, cover, and let rise until doubled in volume.
Turn out 1/2 the dough onto a floured board. Pat it into a circle about 1/4 inch thick. Spread 1/2 stick melted butter over the top. Cut into triangles (like a pizza) and roll from the wide end to the tip to form a crescent-shaped roll. The rolls should be the size of a baby's fist. Or a small mouse. (This is not an exact science. Most of mine come out looking like weird, oddly-sized lumps. They still taste good.)

Repeat with the other half of the dough.
Let rise until puffy.
Bake at 400 degrees until golden brown (about 10 minutes).

YUMMY!

24 September 2007

new kid in town

Olive is very excited. In fact, she has requested a new dress for the occasion. In red.

23 September 2007

looks like autumn

Our Mom was here for a visit this weekend and we had a lovely time. I am absolutely stuffed. So is my fridge. She made us creamed chicken and biscuits, which is the ultimate comfort food. I was going to take a picture of it, but I thought you might be jealous. I also felt a great need to get it into my mouth as soon as possible. Besides eating, we shopped, went to see Stardust (charming, I thought), and generally had an all-around good time.

My flowerpots on the front stoop had gotten completely out of control. Healthy, certainly, but they had grown so big and sprawling it made getting in the front door a bit of a challenge. Mom helped me prune and trim, and we added in a few fall-hardy plants. She made the beautiful bouquet in the top pic with the cuttings.

I seem to be emerging from my craft slump thanks to some excellent reading. Joelle Hoverson's new book is gorgeous. I want to make every single project in it. And to help me crawl out of my rather embarrassing blogging slump, I am going to post every day this week. Probably just photos, but it's a start.

(And if you ordered cards last week, they're in the mail! Thanks to all who ordered!! There are a few sets left, if anyone is still interested.)

19 September 2007

need some stationery?


It's the SALE OF THE CENTURY*. This is an event that is NOT TO BE MISSED.


Okay, not really. But I have SLASHED PRICES on all the cards in my etsy shop. I have a hankering for some new wall art and so I filled up my etsy shopping cart with lovely things that could be mine. But then I realized that my poor little PayPal account has only $11.01 in it. That will do little to sate my handmadegoodslust.


All card sets that were $10 are now HALF PRICE. Just $5. No joke, dudes. So you'd better get over there and ACT FAST. These fantastic prices just WON'T LAST.

;)


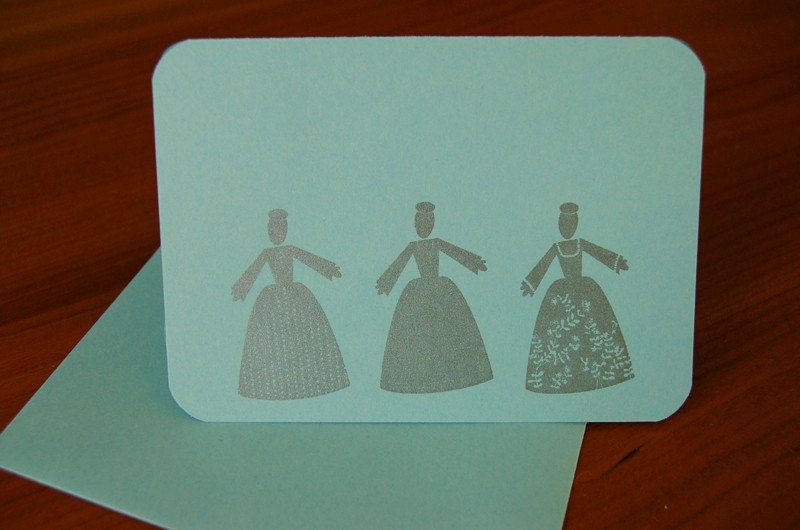
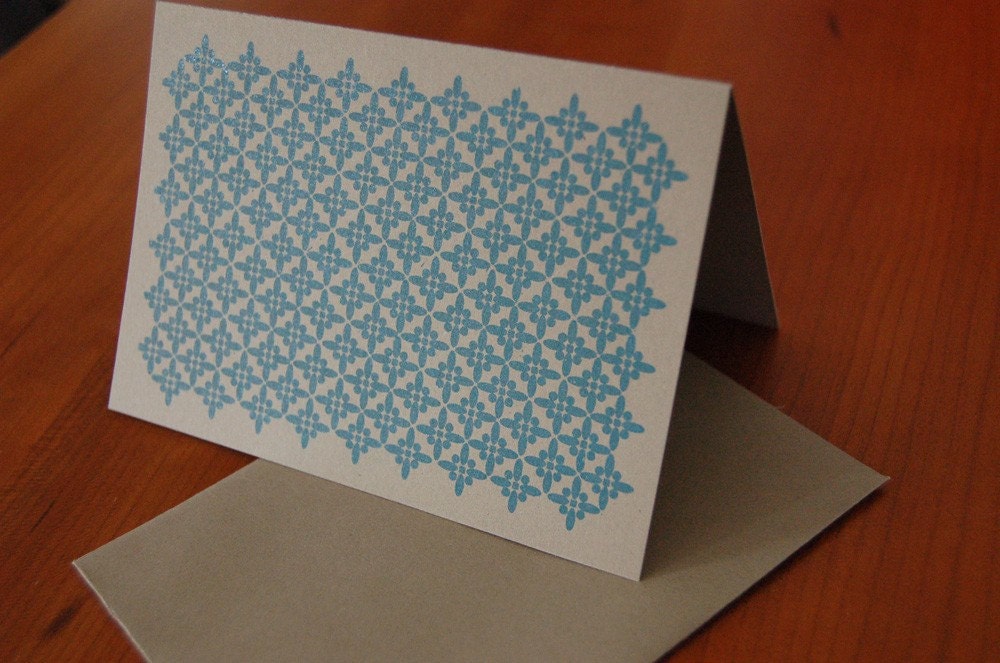
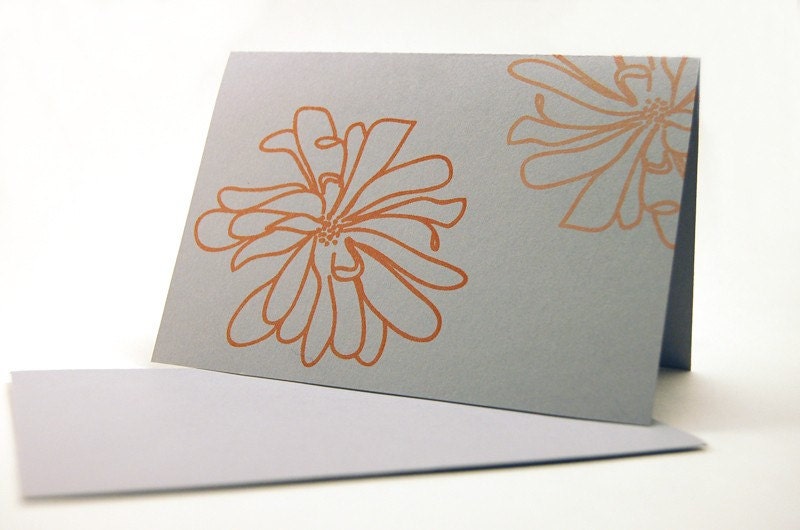
Get the dotty Thank Yous, the lady dolls, the magnolia cards, or the dark blue starry cards.

*Some restrictions may apply. The person doing business under the various pseudonyms of Marmee, MK, Mama, Mumsy, and She Who Must Be Obeyed is hereby restricted from further purchase from the juliemarie etsy shop. Complaints will not be entertained from said person. Said person should petition the craftsperson and proprietress for unlimited free goods ad finitum; this privilege being her just and proper due as giver of life and supporter numero uno.

15 September 2007

dum de dum

Taking it easy over here. Loving late summer. Loving the South. Not doing a lot of crafting, and consequently not blogging much either. (I have trouble blogging when I don't have projects to share. Probably because I rarely feel that my life, though I love it, is particularly interesting to outsiders.) But here's a quick summary of the last few weeks:


1. We spent a lovely weekend camping in the Blue Ridge with our dad. I love these mountains so much, and was happy to learn that the North Carolina part of the range is as beautiful as the Virginia part.


(My daddy has twinkling eyes, doesn't he?)


2. I've read some fantastic books. The great thing about having a novel-gobbling sister is that she weeds out the bad ones, and recommends the good ones. Some of my recent favorites have been The Countess Below Stairs, Mariana, The Morning Gift, Venetia, and Here Be Dragons (links to Twin's reviews).

3. Twin has instituted a new diet and fitness regimen. She is a slavedriver, I tell you. She wants me to eat fruit! And veggies! Like, more than once a day! eeep. We've been biking and walking. Playing tennis. It feels good.

4. Have I mentioned my love of professional tennis? I loved the US Open, though the final outcome was pretty predictable. My heart just about broke for my boy Andy, who played with his whole heart and still couldn't find a way to beat that Swiss machine.


Did anyone else notice this young man? Juan Martin Del Potro from Argentina. He seemed somewhat familiar, and then I realized where I'd seen him. He's a Kouros statue, of course, who came to life atop his marble pedestal, walked right out of the Met, and picked up a tennis racket. It really is a shame he decided to put on clothes. Alas.

5. Slowly crocheting the Shawl that Swallows Time. It is now scarf-sized, and I'm tempted to just stop here. But I will persevere, and I'm sure I will enjoy it when I am 80 years old, which is probably about the time I will finish it.

6. We got Twin's pinboard made and hung over her desk. I love the dark background and the strip of vibrant print.

Our long long drought was broken yesterday by a brief and furious thunderstorm, following by a long drizzly soak. Today the weather is fresh and cool, and makes me think autumn might actually be on its way.

A wonderful weekend to all!