

Materials:
I've made these for the Mini, my 2004-era iPod and the new slimmer video iPod, so I've listed those measurements in the chart below. If you're unsure, make it a little large—you can always take the seams in until your iPod fits nice and cozy.
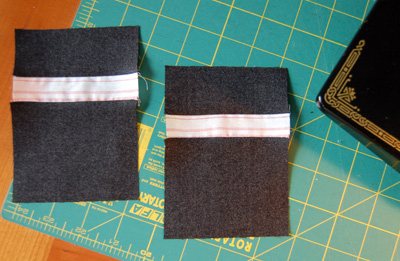
1. Piece the exterior. If you want an accent on the outside, seam together your pieces with 1/4" seams. Keep in mind that the dimensions in the chart above are for the total size of the exterior AFTER piecing, so you'll need to add allowances for any piecing seams.

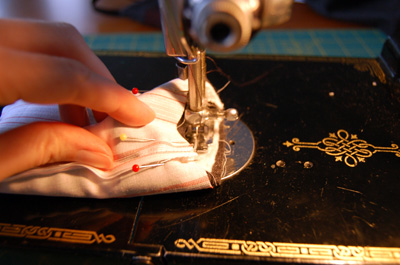
2. Make the exterior sandwich. Place the batting on the wrong side of each exterior piece. Pin your elastic, folded in half, about an 1.5" from the side seam. Sandwich together the two exterior panels, right sides together.
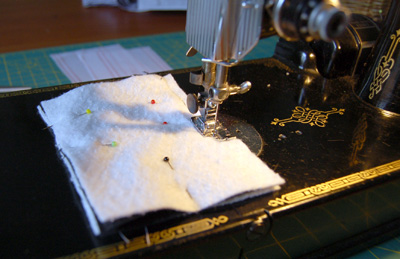
3. Sew the exterior. Backstitching at beginning and end, sew around 3 sides with a 1/4" seam.

4. Sew the lining. Place lining right sides together and sew around 3 sides with a 1/4" seam.
5. Clip the corners. Of both exterior and lining.
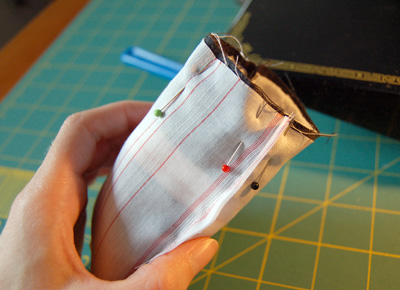
6. Turn the exterior right side out, then place it inside the lining (which is still wrong side out). The right sides of the 2 pieces will be together. Line up the side seams and pin around the mouth.
7. Tricky part. Sew around top with a 1/2" seam, leaving a gap of about 1.5" open. Backstitch at beginning and end, and be careful not to catch your elastic band, which is hanging out inside there, in the seam. Turn right side out, then stuff the lining down into the body.
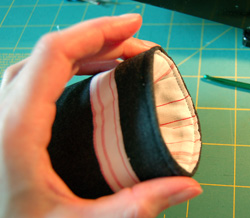 8. Edgestitch around the mouth so that it will lie nice and flat.
9. And now your iPod is all cozy.

16 comments:
thanks Julie - will have to give this a try...probably not until after the holidays, though.
Great tutorial!
Happy Thanksgiving!
You have every right to be bossy! When someone posts tutorials as clear and illustrated as this, I say everybody should stand back and let the pro work her magic. Nice job.
oh i love this julie, thank you so much for making me not have to think about how to do it. i am so making myself one. and how much do i love the scrolley detail on your old singer? very much.
hi there! thanks for the great tutorial!! I also loved to see NYC pics :-) made me a bit nostalgic though, I lived there for 6 years..
happy thanksgiving
The elastic band is genius! Thanks for a great tutorial!
Nice Singer 221!
(I'm the proud owner of a 'white' one ... her name is Tinkerbell.)
-Tomi :)
plaidbasket@yahoo.com
Thanks for sharing the tutorial. I used it to whip up one for me and my daughter. The elastic is a great idea.
Thank you so much for making this tutorial! I just finished one for my iPod Mini. I'm a novice sewer, thus the relative sloppiness of mine, but your tutorial is great.
This is totally awesome. A genius idea!!!
I love all of the devices and accessories that come with the ipod. I only hope that my purse can keep up with all of this stuff.
Katrina
http://www.ellistrations.com/ipodmaniac.htm
Great post and great item. You have inspired me to create an iPod section on my blog!
I made one of these for my creative zen micro - had to adjust the sizing slightly but it worked brilliantly! ^_^
Thanks for such a cute pattern. ^^
Thought you might like a pic of my efforts!
http://i10.tinypic.com/63sbq0x.jpg
Enjoy and thanks again!
Thanks Julie! I love how you use the elastic on yours to hold in the ipod. I made one for my video ipod with a soft microfiber zebra print. It is just a large pocket with a foldover cover with velcro, but the inside is also the zebra fabric so it doubles as a screen cleaner. The only problem is that when you plug in the headphones, the flap almost doesn't close because i sewed it rather close. I'm thinking of putting in a button hole for the headphones tho. I don't the tutorial up on my blog yet, but maybe will someday! I look forward to using your pattern. Thanks!
These are pretty cool. Imagine what you'd have to pay at your favorite Apple store for a nice iPod case.
Hello!
I posted a link to your tutorial on my blog. Hope that's okay! I did a similar (but much plainer) ipod cozy myself. Love the elastic. :)
Idea of making iPod cozy is great. You can also make iPod cozy from digital printed cotton fabric to make it pretty. https://bit.ly/2JL6DBf
Post a Comment