22 April 2012

Jennie's Wedding Quilt


I made Jennie a Single Girl quilt to celebrate her marriage.  That sounds a little odd (and Matt kept calling it a jinx!) but I just love the way it's a modern take on the traditional wedding ring pattern. A modern wedding quilt! Just what I wanted. This is by far the biggest quilt I've ever made--it's queen-sized at 85" x 92".
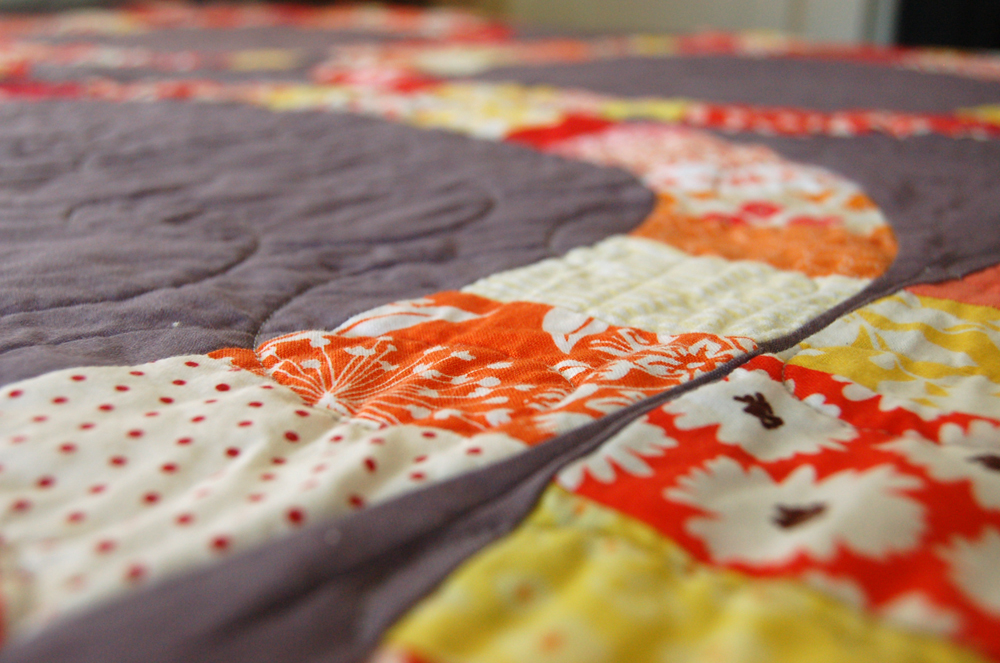

Almost a year ago, I started stashing away red fabrics for this quilt--the pattern calls for 36 different accent fabrics! Jennie's favorite color is red so I focused on red but ended up incorporating some red-oranges and yellows. It was surprisingly hard to find enough red fabrics I liked that were the right tone. I wanted to avoid purpley, dark reds so that it would stay on the very warm side of the red spectrum. I also wanted to keep away from too many pinks so that it wouldn't be girly--it is a wedding quilt so I wanted it to please the groom too!

I used Kona Coal for the background and I really like the way it sets off the circles. I chose it primarily because Jennie and Collin have two dark-haired cats but it also echoes their wedding colors. The bridesmaids all wore gray dresses and the flowers were bright red, pink, orange, and yellow. So it's very reminiscent of their wedding day.


Just the idea of wrestling this thing through my featherweight had me sweating so I sought professional help on the quilting and I am so glad I did! Suzan DeSerres of Singing Stitches in Chapel Hill did the quilting on a long-arm machine. She did an absolutely beautiful job and was such a pleasure to work with. We decided on a simple looping design that goes back and forth across the quilt. I LOVE it.
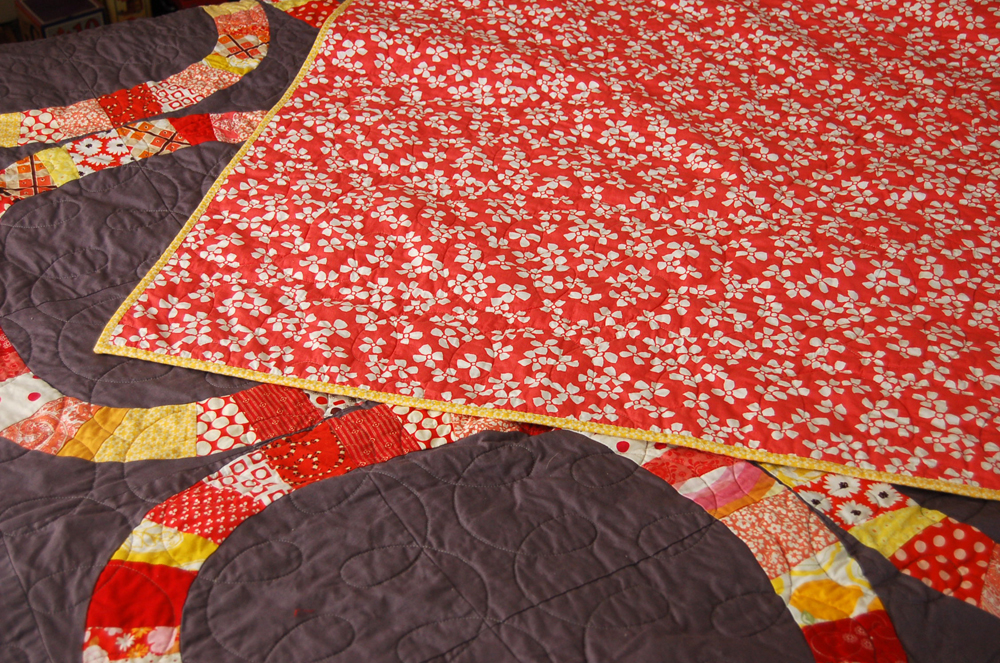

I found some cute percale sheets online to use for the back. I had read that quilting with high-thread count sheets can be a major headache, but these were 200-thread count which seemed to work just fine. It was nice to only have one seam to sew for the back!


The binding is made from two of the yellow fabrics I had leftover from piecing the front. 


Suzan used an 80/20 cotton/poly blend batting which makes it a versatile weight--light enough for use during the warmer months but still plenty hefty.


We actually ended up using the quilt as the backdrop of our ye olde photo booth at the wedding! Here are our friends Carl, Suzanne, and Kelli being all colonial at the reception. (The wedding was in Williamsburg, VA. It was AMAZING and everything turned out so beautifully!)


Jennie and Collin are just back from the honeymoon yesterday. I think this quilt will be part of a very happy home for many many years. XO

16 March 2012

jennie's invitations

Twin's wedding is now just four weeks away, so the wedding-related crafting is in high gear. Jennie is so organized and prepared that I think we could have the wedding tomorrow. Except that it would just be me and her with a whole carload of handmade decorations and paraphernalia, but no groom and no guests. So we'll wait for April 14 I guess. Probably for the best.

Jennie asked me to design the invitations, an honor and a responsibility I took most seriously. Luckily she gave me good direction and liked what I came up with. She wanted: COLOR! Lots of RED! and FLOWERS! Those were her directions. She had seen some invitations by Anna Bond of Rifle Paper Co which served as our inspiration. Anna Bond's designs are absolutely gorgeous and I could only hope that I could come up with something that would at least approximate their stunning fabulousness.

I pulled out my case of acrylics which hadn't seen the light of day in about 4 years and happily discovered that most of the tubes hadn't dried up. I really had a ton of fun painting these little flowers. The color scheme that Jennie has chosen is so full of life and joy, just like her personality.

Weekend before last we had a printing, cutting, and assembling party. Then the invitations were on their way. Here we go!

21 February 2012

sewing goals 2012


At the beginning of the year, Sarai of Colette Patterns posted her sewing goals for the year. I really love how she writes about sewing and style (for instance, most recently about simplicity and style signatures) and it's had me thinking a lot about my own personal style. I've always been a jeans, tshirt and pony tail kind of girl, without a lot of patience for fashion. But as I learn to sew more, the prospect of making clothes that really reflect my own personality is exciting.

So I've been thinking about the beloved staples of my wardrobe: the pants I wore so long that the corduroy rubbed off, the pleated skirt that makes me feel voluptuous (an adjective that rarely applies to my straight figure), the button-down shirt that fits perfectly and is somehow, miraculously, never wrinkly. As I plan my sewing projects, I want to think carefully and realistically about the kinds of clothes that make me feel good. Because that's what it's all about. I'm also going to be more purposeful in gathering clothing inspiration on a pinterest board. So far I'm seeing a lot of mustard, navy, and simple lines. So predictable! But that's what I love.

So here are some of my clothes-sewing goals for the year:
  1. Experiment with fabric. No more quilting cottons! I think I have enough stacked up to make a lifetime of quilts. It's time to tackle lightweight fabrics, silks, knits, wool, twill, etc. I also tend to buy small quantities of fabric, often less than a yard. I need to be more purposeful in finding garment-worthy fabrics that I love and then buying enough for a specific project. 
  2. Focus on wardrobe staples. And that includes pants. Pants! I will make pants this year! I also want to make a dirndl-style dress and a pencil skirt. 
  3. Use the patterns I already own. Sometimes I feel like my hobby is not sewing, it's buying sewing supplies--including patterns. I've accumulated quite a library of vintage and new patterns, most of which I've never opened.
  4. Think about fit. Every time. I'm usually in such a rush to finish a project that I don't bother making a muslin and I don't think through the simple adjustments that would make the pattern fit my figure better.
  5. Refashion existing garments. My closet is overflowing with clothes I don't wear. Some of it needs to go to Goodwill, but a lot of it could be reborn with a few adjustments.
I feel like I've made these goals before. But they are good goals. Looking forward to a great year of sewing!

11 February 2012

green stuff


I may have jinxed our mild winter because it's gotten quite chilly and gray the past few days. I'm paranoid about "jinxes" because Matt says I don't understand them. Not having grown up in a family where sports were paid much attention, I never learned that saying things like "Oh they're playing well!" or "They can't lose at this point, right?" is bad form. So now I am refining my jinxing abilities just to get his goat each time we watch a sporting event together.

Even if it's gotten a bit gray lately, though, we've still had a pretty sweet winter. And I've already started getting excited for spring, bringing bits inside to set on windows and planning what we'll do this year. (Must order veg seeds pronto.) 


Matt brought in some of the hellebore that's blooming outside. I love this plant. They're also called "Lenten Rose" because they bloom so early. They're the first thing to wake up every year and we've got quite a patch of them in the yard. Someone must have planted white and purple ones years ago, and they've spread quite a bit, so that now we have plants across the spectrum from purple to white. Their hardy evergreen leaves are also a staple in the garden through our hot humid summers and mild winters.


I've never considered myself very lucky with houseplants, but now I'm finding that, as with most things, it just takes a bit of effort and patience. And trying a lot of different plants. I planted these common succulents in tin cans on the kitchen window ledge and they're so easy to take care of. I just set them in the kitchen sink in a couple inches of warm water about once a month. That's all they seem to need.


A sunroom with wide windows and lots of natural light also helps. I honestly think just about anything would grow in our sunroom. I have been babying this maidenhair fern, spritzing it daily and keeping it nice and moist, and he seems really happy.
 

Matt bought me this foxtail fern last year. It sat on the front porch all summer, and has thrived in the sunroom this winter. It had gotten really potbound so I moved him to this large bamboo pot last week. He looks a little bottom-heavy but I think he'll fill it out quickly.

Happy weekend! We are going to see Todd Snider tonight, which I am really excited about. I hope he tells the tale of KK Rider. I can laugh until tears stream down my face.

05 February 2012

Matt's Gnome Quilt


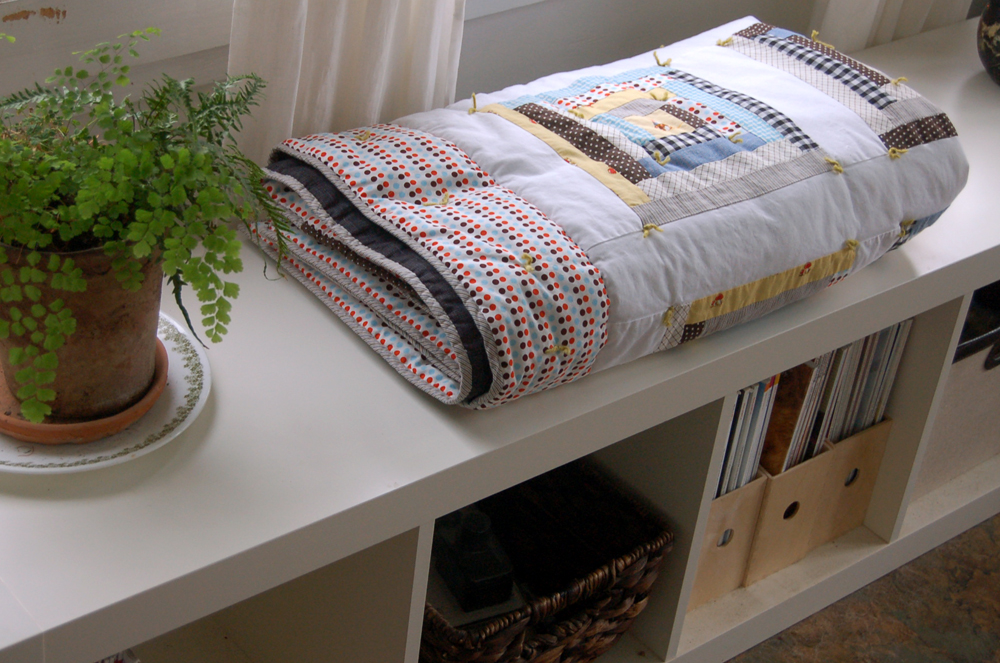
Compared to last year, I definitely slacked on homemade Christmas gifts this year.  This quilt is the only gift I made, and I didn't even finish it until a few days after Christmas. Considering this quilt has been in the works for at least a year, Matt has been very patient. 


I had about a fat quarter of Heather Ross gnome fabric hoarded in the stash, so I fussy-cut each little gnome to live in the center of my log cabin squares. The other fabrics are a random assortment of prints. I was going for whimsical masculine, which kind of also describes Matt.
 

Twelve gnomes inside twelve squares. It's sized to be a lap quilt, about 50" x 60".
 

The back reminds me of the racing stripe on a sports car.


Around the time I was ready to quilt it, Alicia posted about her latest quilt. She used poofy wool batting and ties instead of quilting. Since the quilting step is my least favorite part anyway, I decided to follow her lead. I used green yarn to tie the quilt on each square and around the border. I also put one running line of hand-quilting along the ditch where the border meets the sashing (it's blue, look closely above).

I think the hand-quilting is a nice touch, and I do enjoy doing that kind of quilting. I mostly just don't like wrestling quilts through the sewing machine. Maybe I should add a long-arm quilting machine to my wishlist. You know, for when I win the lottery and have a sewing studio that is four times the size of my current one...

I did get a serger for Christmas, which is extremely exciting. Every time I sew a seam, I have to serge the raw edges. Even when it's not really necessary. Just because I can and it looks so dang cool. I have already made one very wonky t-shirt. Knits really are a whole different world.

Hoping to be back in this space more this spring. We have daffodils and quince and forsythia already. This has been the strangest winter. I'm totally cool with that. Let's move straight into spring!

21 September 2011

hawaiian quilt

One of our dearest and oldest friends got married this summer in Hawaii. I wish that I could have made the trip, but I think Hawaii might be a once-in-a-lifetime kind of thing, and I used up my once in a lifetime a few years ago when my parents cashed in all their frequent-flier miles and toted the whole family to Maui for a week. I remember thinking on the dreadfully long flight over there that it couldn't possibly be worth it. And then I stepped out of the airport and said, "oooooh. ahhhhh. yeah, this is totally worth it." It was an amazing trip.

So we didn't get to see Suzanne tie the knot in person, but we certainly wanted to celebrate her big day. And what better way to celebrate than with a bright, cheerful, hawaiian-inspired quilt. Jennie and I collaborated on this project and two twin heads is better than one. I love how it turned out.
 We used Denyse Schmidt's Proverbial Quilt pattern for the letters. Jennie and I each did two rows of words and I sneakily gave her the "HAWAII" row because the W involved about 10 pattern pieces and looked mighty tricky. She nailed it, of course.

We picked out the brightly-colored print fabric used in the border first and took all our color inspiration from that, ending up with a rainbow of jewel tones. After we'd pieced the letters, I remembered that I had started appliqueing a Hawaiian quilt motif years ago when we made our trip to Hawaii. I'd always intended it to be a pillow but I had never finished it. The green color worked perfectly with our quilt so we put it in the center. It was meant to be. I obviously started that applique project 4 years ago because Suzanne was destined to get married in Hawaii. Like tea leaves, the unfinished projects that litter my craft room predict the future.

Jennie did all of the quilting. I think I should have her do all of my quilting from now on. It's awesome. She did a large chevron pattern with machine-quilting around the outside, then hand-quilted the traditional Hawaiian pattern on the motif. I just had to look it up in my little book I bought in Hawaii--it is a breadfruit pattern. I love the mixture of the organic lines of the breadfruit with the geometric lines of the chevron. Killer.

I take full responsibility for the piecing of the back, which, frankly, just looks like a big old mess. I used leftover bits of the fabrics we used for the letters on the front, but just kind of sewed it all together willy-nilly. It definitely could have used a bit more planning, but it is bright and cheerful. And after all, it's just the back.

Suzanne's parents hosted a lovely reception at their house in VA a few weeks after the wedding, so we did get to party with the happy couple. On the car ride to VA, Jennie and I sat in the back seat and sewed the binding on the quilt while her fiance chauffeured us. Oh, haven't I mentioned here yet that Jennie is engaged? YUP. April 2012. We have a bajillion craft projects planned and our Mom is planning to make the cake. We talked her down from trying to cater the whole shindig one-handed. This should be fun.

30 August 2011

mini-bathroom renovation

Sorry for my long absence! We've been enjoying the end-y bit of summer, which has been dry as a bone and hot as hades here. (I'm not complaining, though. Weeeeell, maybe I am just a bit. Looking forward to lovely crisp autumn and all that comes with it.) We had a two-week "staycation" at the end of July, followed by a week with my family in the mountains. Now, fully rested and totally depleted of vacation hours, it's back to work we go.

Our staycation was lovely though, full of great food and summer movies and relaxing together. Around the beginning of the second week, I started thinking "my, wouldn't this be a great time to try to renovate the bathroom a bit?" I mentioned this to Matt, at which point he sighed heavily, then gamely agreed to help me. Because he's such a good hubby.

This is the master bathroom, which is remarkably large for our modest, 1920s-vintage house (we think it was added on at some point). The fixtures are all fine, if a little generic. Since moving in, we've talked about doing a gut renovation "some day," and I started a wish list: free-standing tub, vintage-style lighting, hexagon tile flooring. But the reality is that we probably won't have the moola for a total renovation for many years. So we set out to see what we could do with as little investment as possible. The total renovation is still on the wish list, but we wanted to make it a more enjoyable space right now.

I forgot to take a "before" shot, but here's an in-progress picture to show you what we were working with. The floor was a hunter green vinyl sticky tile and the walls were the color of a band-aid. Somebody at some point must have liked this color combo. I'm not a big fan. I knew just changing those two elements would make a huge difference.

We stuck with sticky tile (hee) but chose a light, faux-marble one from Lowes. The colors in the tiles are quite lovely--mostly white and cream but with enough gray and brown smudgy bits that it has a lot of depth. And it hides dirt like a dream. I actually really enjoyed laying the floor, believe it or not. It was like one giant jigsaw puzzle. I LOVE jigsaw puzzles. Matt does not. We realized this after an hour or so, so he took over the painting from that point.

The walls are a very pale blue-gray and we repainted all the trim white. We also painted the base of the vanity a medium gray. I had originally chosen a minty green color that ended up looking dreadful. Just awful. Matt gave me an "I told you so look" and helped me pick out the gray color. Much better. We also replaced the giant frame-less mirror above the vanity with a smaller, framed one that we already owned.

We replaced some of the hardware with shiny new ones. The rusty black floor vent was replaced with a bright white one. We finally mounted a toilet-paper holder on the wall (we used to just keep the roll sitting on the back of the commode...it took me three weeks after installing it to stop twisting around behind me to reach for the tp).

This odd corner beside the shower is where we store our linens. There used to be two large, deep shelves here where we piled all our linens. It was impossible to keep it organized and neat, so we took down the shelves and put in an inexpensive storage cabinet. Now I don't have to stare at a jumble of towels and sheets.

I was going to sew a new shower curtain but then found this awesome one at Target. We also picked up the wooden floor mat and the cheerful yellow trash can there. I like the yellow accents and warm wood tones against the cool gray background.

I don't normally keep fresh flowers in my bathroom but maybe I should. I also hid all my ugly toiletries and only left out the pretty ones for these photos. I maybe watch too much HGTV. Speaking of which, there is an episode of Design Inc (here are some pics) that really inspired this bathroom. I love me some Sarah Richardson. I don't know that I am posh enough to live in any of her houses, but I do love watching her shows. Especially Sarah's Summer House. It is a modern day Blue Castle. (And if you haven't read The Blue Castle by L.M. Montgomery and have no idea what I am talking about, you need to read it. It is one of my favorite books of all time.)

I had to include this picture because Abby looks like a ghost. A sweet, friendly puppy ghost.

The whole "mini-reno" probably set us back about $200 and a few days of labor. One day we will get our claw-foot tub and ceramic tile, but in the meantime I know we will really enjoy this space.

13 July 2011

seersucker shirtdress

I finally made a Lisette pattern! This is the Traveler dress, view A. I didn't alter a single thing, cut it out and made it exactly as the pattern instructed. And it's PERFECT. This is probably the best homemade garment I've made so far. It fits me perfectly, is super comfortable, and is very flattering. It's even cute without the belt because the shape of the dress is so nice.

I used an inexpensive gray stripe seersucker that I got at Joann's. I can remember my grandma had a shirtdress exactly like this. Except hers had shoulder pads because it was the 80s.

The pattern is lovely and straightforward, and includes some really helpful tips along the way. I learned some new things, such as the clever way of finishing the top of the patch pockets with a pintuck. It's also interesting that this collar is all one piece, so you don't have to bother with a collar band. Genius.

It came together quite quickly--I was able to do all the sewing in one afternoon + evening. My buttonholer attachment was being fussy so the 10 buttons seemed a bit intimidating. But the buttonholer cooperated in the end and I attached the 10 charcoal buttons to finish it.

I'm excited to try the other patterns. The Portfolio tunic might be next.

10 July 2011

summer bounty

Yesterday's haul out of the garden. We are drowning in summery goodness.

Piles of fresh produce are the mother of invention and I have been trying out new recipes in order to keep up with the inventory around here. Matt's Mom brought us blueberries, ranier cherries, bing cherries, and peaches last weekend and despite munching on these goodies all week, I realized yesterday morning that I still had a pile of fruit nearing over-ripeness. Must save the fruit!

So I made a crisp. I almost went with my old stand-by crisp topping (melted butter, brown sugar, oats) but decided to try something new from Rustic Fruit Desserts. I used the almond crisp topping and oh. my. goodness. It's just butter + sugar + flour + toasted almonds but it could not be more delicious. I was nervous because Matt doesn't normally like nuts in his desserts (I know, crazy), but even he pronounced it awesome.

This week we've had so much rain that the tomatoes are splitting open on the vine. I dashed out to save them and then put together this watermelon tomato salad from the August Martha Stewart (sorry can't find the recipe on her website, must not be up yet). I didn't bother with making the basil oil, instead I just tore up some basil leaves. A little goat cheese, lemon juice, and a drizzle of olive oil. Quite tasty.

And this was my lunch yesterday, which was so pretty I had to take a picture. This is uncommonly healthy for me. I had a bowl of crisp for dessert to make up for it.

Now I need to figure out what to do with all this yellow squash. Matt tells me his Memom always made fried squash cakes and called them "croquettes." I'm thinking about this recipe. Paula Deen and fried food--can't go wrong. Any favorite squash recipes?

22 June 2011

squares within squares quilt

The baby quilt is fini, and sent off to Atlanta where it will help welcome a new little baby soon. Although it's for a baby boy, I didn't want it to be too "boy-y" so I went with a more gender-neutral yellow and turquoise color scheme. It's a mix of bold, bright patterns with a few more subtle ones, like the yellow stripe seersucker and the pale blue dot.

The square-within-a-square pattern was fun and quite simple to piece. I didn't realize until sewing all the strips together that because of the sashing there was not a single seam that had to be carefully lined up. Sweet! I had one stray block leftover, so I incorporated it into the back of the quilt.

I did a simple quilting pattern--just straight lines in one direction. I still don't trust my walking foot very much. I need to practice more.

Binding is always my favorite part of a quilt. (Is that weird? Am I the only one?) I love the actual task of binding by hand, and I love the look of the finished binding. A lovely way to finish a quilt project.

Sending wonderful happy thoughts for this new family of three!

15 June 2011

my anniversary present

For my anniversary present, Matt had an old piece of my grandmother's cross-stitch custom-framed. I love it so much.

I found the sampler in the depths of my grandma's linen closet when we cleaned out her house. I don't know when during her lifetime she made it, or why she never framed it. I don't really remember my grandma doing much sewing or embroidery, though she must have done quite a bit earlier in her life. I'm not surprised at all, though, by how perfectly neat and precise her cross-stitch is.

The sampler is made up of delicate little motifs of flowers and animals, all in the most lovely muted colors.

Her initials are in the very center of the sampler. My grandma's name was Genevieve, which I've always thought such a beautiful name. She would laugh because many people didn't know how to pronounce it, and she was usually called "Gen." She died just over a year ago, and I'm so glad to have this little reminder of her where I can see it every day.

I knew that Matt was framing the cross-stitch, because I went with him to the store and hemmed and hawed endlessly over the framing options. I didn't know, though, that he also ordered and framed a photo of us. My brother took this picture of us at our family reunion last year. We're walking away from the camera, and we just look like we're having a lovely conversation. I can't remember if we were, but probably so. We tend to have mighty nice conversations.