
Showing posts with label tutorial. Show all posts
Showing posts with label tutorial. Show all posts
23 January 2007
handquilting tutorial
This past weekend I got what seemed to be a brilliant idea to do a tutorial on handquilting. A video tutorial on handquilting. Someone should have stopped me right there and said "but you don't know how to make videos." Small detail. Someone probably also could have stopped the madness before it began by reminding me that I was going to have to speak during the darn thing and then everyone was going to hear my voice. I don't even like talking on the phone, much less broadcasting my voice far and wide across this mighty internet.
But well, fools do rush in, so I made the movie. The resolution is pretty awful and it's a bit hard to see what we're doing in places, but I hope it is moderately instructive. It's a beginner's tutorial for handquilting. Even if you've never picked up a needle, you can do this. My many many thanks to Twin, who I managed to rope into demonstrating her technique, which is far superior to mine.
And I'll state for the record that I do not in real life have a lisp. I watched rather helplessly as the video and audio quality diminished from somewhat crappy to nearly unwatchable with each step from transfer to compression to upload.
I almost didn't post it. But then I decided that life is way too short to be shy.
21 November 2006
iPod cozy tutorial
Somebody mentioned they'd like to know how I made my iPod cozies, and I am most happy to oblige. After all, I am quite bossy. I love telling people how to do things. So here's the skinny. It's quite straightforward and I took lots of pictures, so I hope everything's coherent. If not, just shoot me an email!

Materials:
I've made these for the Mini, my 2004-era iPod and the new slimmer video iPod, so I've listed those measurements in the chart below. If you're unsure, make it a little large—you can always take the seams in until your iPod fits nice and cozy.


1. Piece the exterior. If you want an accent on the outside, seam together your pieces with 1/4" seams. Keep in mind that the dimensions in the chart above are for the total size of the exterior AFTER piecing, so you'll need to add allowances for any piecing seams.

2. Make the exterior sandwich. Place the batting on the wrong side of each exterior piece. Pin your elastic, folded in half, about an 1.5" from the side seam. Sandwich together the two exterior panels, right sides together.

3. Sew the exterior. Backstitching at beginning and end, sew around 3 sides with a 1/4" seam.

4. Sew the lining. Place lining right sides together and sew around 3 sides with a 1/4" seam.
5. Clip the corners. Of both exterior and lining.
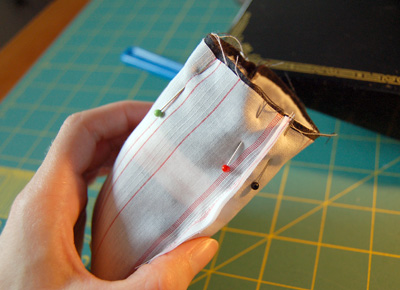
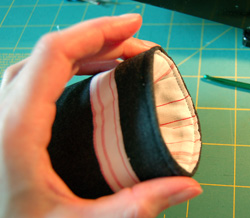
6. Turn the exterior right side out, then place it inside the lining (which is still wrong side out). The right sides of the 2 pieces will be together. Line up the side seams and pin around the mouth.

7. Tricky part. Sew around top with a 1/2" seam, leaving a gap of about 1.5" open. Backstitch at beginning and end, and be careful not to catch your elastic band, which is hanging out inside there, in the seam. Turn right side out, then stuff the lining down into the body.
 8. Edgestitch around the mouth so that it will lie nice and flat.
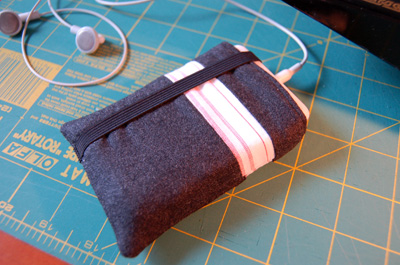
9. And now your iPod is all cozy.

Materials:
I've made these for the Mini, my 2004-era iPod and the new slimmer video iPod, so I've listed those measurements in the chart below. If you're unsure, make it a little large—you can always take the seams in until your iPod fits nice and cozy.
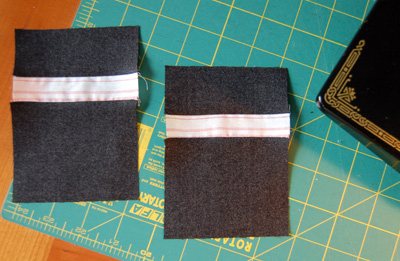
1. Piece the exterior. If you want an accent on the outside, seam together your pieces with 1/4" seams. Keep in mind that the dimensions in the chart above are for the total size of the exterior AFTER piecing, so you'll need to add allowances for any piecing seams.

2. Make the exterior sandwich. Place the batting on the wrong side of each exterior piece. Pin your elastic, folded in half, about an 1.5" from the side seam. Sandwich together the two exterior panels, right sides together.
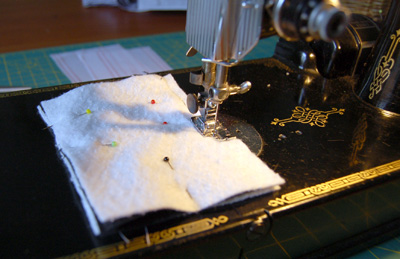
3. Sew the exterior. Backstitching at beginning and end, sew around 3 sides with a 1/4" seam.

4. Sew the lining. Place lining right sides together and sew around 3 sides with a 1/4" seam.
5. Clip the corners. Of both exterior and lining.

6. Turn the exterior right side out, then place it inside the lining (which is still wrong side out). The right sides of the 2 pieces will be together. Line up the side seams and pin around the mouth.

7. Tricky part. Sew around top with a 1/2" seam, leaving a gap of about 1.5" open. Backstitch at beginning and end, and be careful not to catch your elastic band, which is hanging out inside there, in the seam. Turn right side out, then stuff the lining down into the body.
 8. Edgestitch around the mouth so that it will lie nice and flat.
9. And now your iPod is all cozy.

Subscribe to:
Posts (Atom)